Wednesday, August 31, 2022
Lights: Keeping Up with the Times
Friday, August 26, 2022
If you are decluttering, toss these first! (May contain bad news...)
...bad news if you are really attached to vintage Pyrex/Corning Ware/Corelle dishes, mixing bowls and baking items. You know, those really nice, sturdy, good-feeling dishwasher-able dishes that your mother and grandmothers had in their kitchens. Ah the nostalgia!
I am interrupting our regular content to send out this public service announcement. I tried a regular lead test from the hardware store on these older kitchenware items this morning, and they instantly tested positive. I wasn't surprised because I had read about this recently. But I'm sentimental and I'm frugal and thought I would just try it for myself before committing to toss them.
The cup (Nancy's coffee cups-- boo hoo!) I tested on the rim. We were using them a lot because they were kept in a handy spot. Besides, they were almost indestructible and felt nice in the hand. The baking dishes I did over the decals.
Although some websites state that the inside is probably okay, the paint and decals on the outside are inevitably scratched and leaching lead. Plus, you are washing the leaching dishes with your other dishes. It's not worth it. So I filled up a box with vintage glass kitchen items from my favorite people to send to the dump.
If you love it a lot, keep it as decor but don't eat from it. I decided that I would rather have the cupboard space, and chose to keep my grandmother's antique teacups for my display spaces instead of vintage Pyrex.
Thankfully the lead tests did not at all register on my modern fine china (I even broke and extra saucer to test all surfaces inside and out), although I undertstand that those tests are not perfect. For a not- perfect test to instantly pick up on the lead of all the old Pyrex and Corning dishes, though-- that's good enough for me!
You can find quite a lot of info online if you need more help letting go. Think of it this way: you get to buy yourself some new dishes now!
Wednesday, August 24, 2022
Spring Rush, Lights, and a Caulk rant
Techincal note: I do not know why Blogger is showing some of my post text as a smaller font. Everything is checking out to be "normal" when I go to edit it. If it shows up on your device that way, I apologize for the inconvenient reading!
As Spring raced on, we were in a race of our own: there was a house being built nearby, could we finish ours first?
It
was very busy on our side of the county with house-building, and we had
already seen a few new houses to “race.” We had already lost the “race” with a
friends’ house that was twice our square footage (as if there was ever a chance on that, HA! they were
in theirs at Christmas). We lost the race with the red spec-house down the
road, the giant mansion over the hill... Then one day one of the lots close by was
cleared, and a foundation poured. Well we knew how it usually went with us, so this one
was going to be “Their house to our trim!” Soon a truck pulled
up over there and unloaded already assembled walls. Sigh. Not only that, it turned out to be something like a tiny house. Not fair.
Amazingly that there were some big leaps of progress on ours. Most notably the electricity. We hired our electrician again. The man's memory was amazing! We needed reminders of what we put this here for, what is that wiring there, and other stuff we forgot. He knew exactly where wires were that no one could even see any more! We decided that electricity wasn't "our thing."
I recall telling the electrician long before how I wanted to stand at the front door and be able to turn the living room, dining room, kitchen, entryway, porch, stairs, and Christmas lights on. I think the electrician thought it was quite amusing, and suggested that for some things, I could just walk over to another area to turn a light on. The photo you see is my bank of switches (I had wanted more). The electrician can laugh now; I still haven't labeled them and I am always turning on the wrong lights first.
The second story now lights up, and heaters were functional. Light and heat! There could have been even more light at that moment, but I had not purchased all the fixtures yet. I really wasn't expecting "finish electric" to be done so suddenly!
With the upstairs lights now working, I was excited to see what the blue
paint I put in the half bath looked like with a light on it. It looked like an aquarium in daylight, as seen above. Did electric lights improve it? Nope. Back to the paint store on that one.
I ordered a dining room light, I think we ordered it from Wayfair. Of all the lights in the house this was a comparatively easy find. What we had in our mind's eye just happened to be in style. Some of the others weren't so easy to locate. We still have some lights I consider "temporary" and hope to replace someday. Other lights were what I thought I wanted, but after a while realize they aren't quite right. I guess that is just the way it goes!
The search for tile seems never ending. I saw this tile at the store and was contemplating it for the laundry room floor. It was a stone texture. Compared to the other tile on sale that day, I thought it looked like a good price until my son came home from work and said his boss got tile for 30 cents a square foot! Oh, and his boss bought a door that was $1,200 off. You read it right– the price was $1,250 and it was discounted to $50. That spurred me on... we were going to have to shop around, find bargains, go to all the area ReStores.
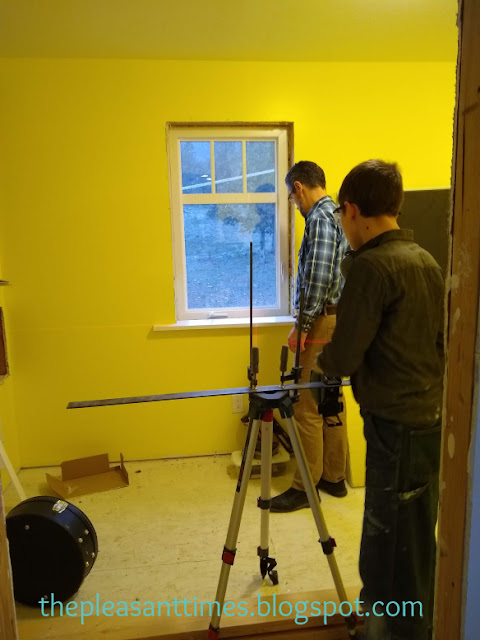
My husband put up the newell post for some temporary railings. The post had to be set very straight and the laser level is one of the best tools around.
I liked the look of the temporary railings, made of flooring scraps. They reminded me of a farm fence. I was seriously considering going for this style (and it IS a style of stair railings I had seen before), but then my brain kicked in. Yours was probably already working the minute you saw the photo. No way would you have something like that with kids around. They will only see ladders when they look at it!
Having the older children involved in projects such as priming meant that if I could not finish an area for some reason, I could hand the paint brush off to one of them and know it would get done. Even the small guy figured out what to do with those brushes, though he was probably wondering where the paint buckets were.
He was especially interested whenever I washed the brushes and rollers. He never wanted to miss a clean-up. I don't know why it was so fascinating to him. (I cleaned the paint stuff in our RV bathroom for lack of anywhere else to do it at the time)
After talking to a knowledgeable paint guy, I decided to double
prime the walls. Somehow or other, I don’t know if it was an impression I got from
the can label or somewhere else I was reading, I thought one coat
would be good enough. Our drywall was extra thirsty. This double-coat decision messed up the calendar and delayed things, of course.
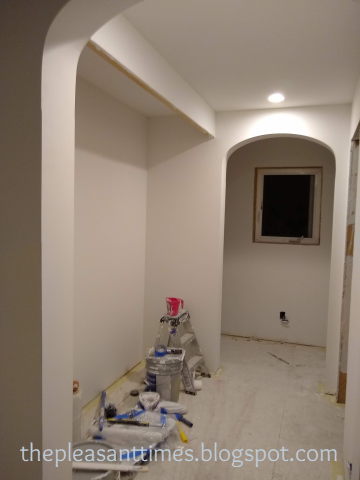
We had forgotten to finish the top stair reading nook when the drywall was being done, and I was so used to seeing the hole in the wall I forgot that it wasn’t finished yet! Plans had changed about how to trim it out, and it ended up being an arched entrance. It looked a bit like a doghouse to me so I was disappointed, but of course I got used to it. Anyway had to call back the drywall pros and ask if they could mud it...
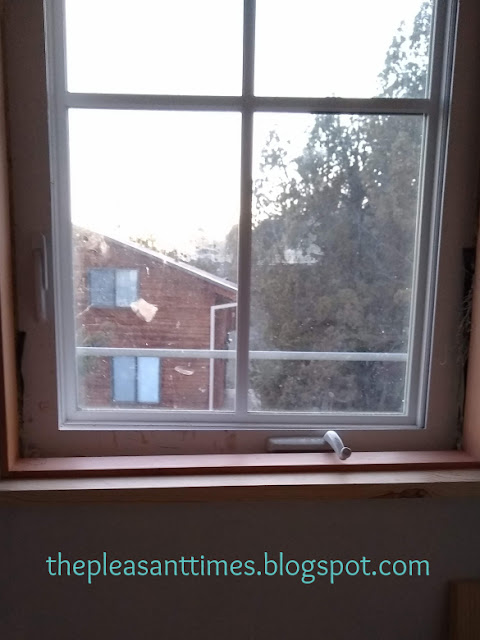
The window trim was taking a month or so to install. We did all the caulking ourselves, and to this day I wish I had hired it done (if that is something you can hire out). The exterior caulking for some reason was great (probably because my husband did that part), but the interior caulking was so difficult to get right. I watched so many YouTube videos of experts giving tips, my contractor relative gave me tips, and our drywall pros gave me tips, but I never developed the knack for it. Neither did my helpers. I blame the caulk itself! But no matter which kind I tried, or which tool I bought, it was difficult to control. It shrunk and left holes, or it smeared and immediately attracted dirt and sawdust to itself. There is a particular brand I know we bought by the box-full, and whenever I see Matt Risinger recommend it on his channel, I want to yell at the screen: "That stuff is awful!"
We
had to call a “progress inspection” to make sure that our permit did
not lapse again. The inspector said, “you’re getting close!” Yeah,
that’s what the last guy said.
Monday, August 22, 2022
NO No no... Windowsills
We've had several memorable discussions about certain parts of the house. Discussions about, oh, things like where the kitchen light should be and how to build a windowsill.
I am certainly still ignorant about most aspects of construction, and am not the one who knew about efficient ways to do things. Nothing is more annoying than having someone like me show up on site and start with the questions. But I instinctively knew about windowsills!
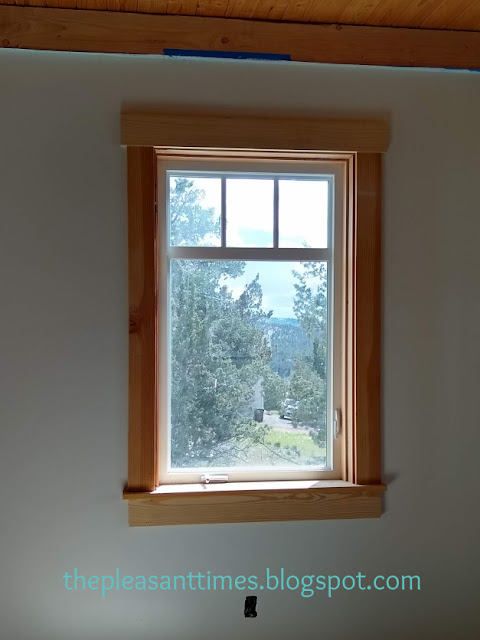
Seeing this bit of the window trim gave me pause.
(Ooh, that's a nice way to put it. Better than "panic.")
We built the house with deep, thick walls. This was partly because of our exterior insulation adding to our depth, but also partly by design. A thick wall is delightful. Your windows can sit back into the wall, and there is the prospect of a windowsill worthy of the name both indoors and out. The look is just what we wanted. But that windowsill? No no no! This can't be!
Up to this point, I hadn't been paying much attention, except that I knew that a tremendous amount of mathematical calculation was going into the window trim, stock was being carefully measured, cut, labeled, and counted. I was even priming some of it! Installation was underway and minds were certainly focused on getting it all done exactly as planned and in a perfect way.
I was very upset about the sill. What is the point of getting a delightfully deep window, the prospect of a 6-inch-sill, if you are just going to chop it up into a four-inch/two inch two-level non-sill??? Before we move on to another window, could we get the sill to be one piece? I knew everyone would be say "No way! Not now! Too late!" but I knew that if we could change it, they would thank me later when they could put their tea-cup and book down on the (flat and proper) windowsill.
Suggesting a change to anything already deep in the
process of being built? You might hear this conversation:
“Why is such-and-such this way? Could we have it another way?”
“NO NO NO– It would require tearing out a wall/ taking a solid month/ a million dollars/ totally destroying the house!"
Turns out that every little piece of trim stock in the entire house was dedicated for some part of this window, and if I took one of the pieces out the whole system would fall apart. It had already been designed down to the last inch of trim! Too late to go back to the drawing board?
They measured, re-measured, said no, yes, no, yes, no…
Thankfully, everyone worked through the
objections, swapped some inventory around and found that they could,
indeed, build a 6-inch sill after all.
Happily, the rest of the windows in the house have perfect windowsills. You can rest your book, a plant, clock, Christmas decoration and yes, your teacup and saucer* on them. You can even sit on them! GO BIG WIDE WINDOWSILLS!
Maybe they were playing a victory song!
We do still have one windowsill in the house that is not flat-- the first one they built in the yellow room. At the end of the day, that one was stayin' put.
*but for the longest time they held tools, boxes of screws, and various small construction items, proving that everyone truly appreciated a functional windowsill!
Friday, August 19, 2022
In Which Spring Come and The House starts looking more like a House inside (Extra Long Post)
We've had a busy week, but hopefully I can catch up on the postings!
When I started blogging again it was rather overwhelming, so I told myself I would just do short posts and captions. Now that I am back "in the groove," in order to speed this up I'm going to try some longer posts and hope it isn't too hodge-podge for you!
A mountain bluebird on the power line. Not the best photo, especially since he's the same color as the sky! By theway isn't that a gorgeous blue sky? I was really tempted to do something with blue paint.
Spring came! Oh, it was such a relief. The snow melted quickly off of our southern facing hill. It was so startling to see our bare, warm gravel and grass, then turn around and see the snowy view! What season were we in, anyway?
The temperatures gradually rose every day until it was in the 50s. At that point, our RV heated up with the sunshine so much that we didn’t need the furnace on, which was great because the furnace didn’t run anyway as the propane was all gone. The Propane truck finally made it up the hill a few days later. One good thing about RV living in those situations is that we had dual power to our water heater, which meant we just ran it on electricity. It never quite worked out for showers and dishes our crowd and I usually ran both electric and propane to keep up, but we made do. Another perk of an RV is that there’s back up battery power, so that when the electricity was off for a while one evening, I was totally unaware of it as the lights were still on.
I don’t know if I’ve ever complained told you about how we managed the electricity with full-time RV living. Our mornings went like this: “Okay, turn off the space heaters and run the kettle for tea…now that the tea is made could you unplug the kettle and run the toaster oven?… Now that we have toast with our tea let’s turn the heaters back on…. oh dear, why isn’t this working? Uh oh, I accidentally ran the vacuum while the instant pot was going, Kids, could you check the breakers?”
We almost started the trim painting one week. Doesn't sound like a big deal, but if you don't do things in the right order you mess yourself up! I was eager-beaver to get going on the next step in painting. We had to halt for we realized that A) we didn’t have our priming technique perfected and we should have started on scraps {NO STREAKS ALLOWED}, B) we didn’t know what piece was what, and most importantly, C) we would run out of places for the wet boards to dry. The entire process was halted for more important reasons though! We realized that we needed to inventory the trim stock, measure it all, measure each window, make a cut sheet and then prime and paint. Oh!
Getting important info on how to do the window trim. That discussion deserves another blog post all its own.
Some rain dumping, over there.
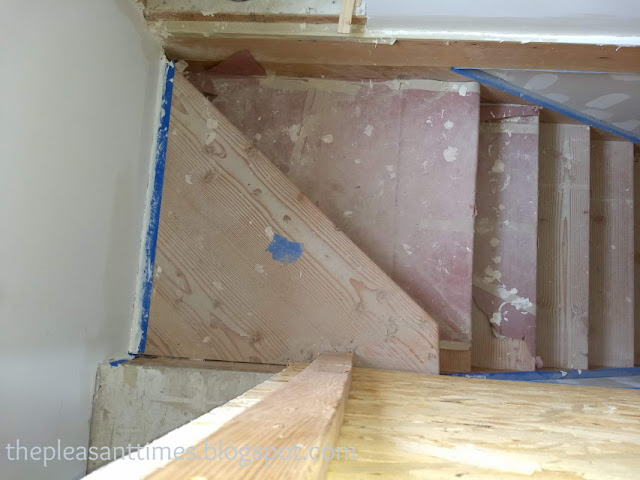
One of our stringers (sides) had cracked on the lower part of the stairs, so it had to be removed and replaced. It just so happened to coincide with our drywall experts needing to come back and finish the second floor, so it was interesting timing.
Lumber dimensions are not really what they are named, as you probably know. Here is an eleven-inch, "2x12" board for example.
The little playhouse under the stairs was coming along!
Several spots on the first floor were ready for drywall mud.
Even though we were "ready," there were always those little changes here and there that we had to inform our pros about when they came in the morning, and could they mud them? Because the outlet moved, the door moved, the wall moved...
The arches upstairs looked great when they were mudded.
Something dumping over there.
And all along the way, we looked at tile. Sometimes we bought some to bring home and lay out, and then returned it if we didn't think it would work. But, there were always those we were too late to return and I think I still have a box of this sitting around (I don't even like this one!).
It was starting to look more and more like a real house! I extended my hopes to Christmas (which were formerly at June, and formerly the Christmas before that...) to be able to move in.
View from our big "backyard"
Friday, August 12, 2022
"Camping" in Winter
Winters around here seem to pack their punch just before Spring.
The locals called it an "unusual snow event." Things were canceled. Some businesses didn't bother to open. Cars got stuck in the snow. The trash didn't come for three weeks. The drains in the RV froze. And we all got sick.
Just another slice of RV living! If I could dish out #1 top advice for building a house, don't try the RV living part! Build a tiny home or live in a garage! It's only fun and functional for a while, and then it is very un-family-friendly uncomfortable. I was washing dishes for a family of eight over a dishpan and throwing the dishwater out into the snowbank. Very pioneer sounding, eh? Here I was camping in winter, and this was what we lived in town the previous winter to avoid (that winter was of course perfectly mild. Murphy, why me?).
There were worries about getting propane refills and the like, but eventually snow must melt. I always like to read the "forecast discussion" page of the National Weather Service. Here's what it said as we inched closer to the spring date on the calendar that year:
“There will be a slight increase in afternoon temperatures Thursday through Friday but only in the 30s to around 40…just enough for melting of icicles, top layers of snow sublimating or changing to slush, and the unfortunate decaying of snowmen.”
Somebody had to have a sense of humor. One of the cars' batteries was dead from sitting so long freezing. All the windshields in the family's cars were cracked from little red cannonballs that they sprinkle on the roads around here, and the deep cold. People were sending me "happy sunny day" messages from the Land of Spring. Clearly we needed to be prepared for something a little more arctic here heading into March.
My son thinks this crazy thermometer is the stupidest thing ever, but I like it. I think it's an optimistic thermometer.

