Friday, October 28, 2022

Using Plywood for Finished Floors. Yes, We Really Did That! Part 6

No this is not the stained floor, it is just the lighting, but note it does not look like plywood, does it? 
I suppose I'll be crowing about that for years to come. It was such a success. From the price, to the fact that I could bring home a stack of 4x8's in the back of the mini van (good ol' mini van!), to the ability to rip them down to the wider sizes. I'm so glad we gave it a try!

After the installation, it was time to rent a sanding machine. This machine was affectionately called by the rental company "the Fun Machine." It was heavy, awkward, loud, and vibrated the user from the toes to the sore back.

A floor! We had a finished floor! 


And a clean house, too.

Never again will it be this clean.

Critically examining the sanding job. 

I am not the first person to get all poetic-feeling about the sunshine on the floor, but it still makes me so happy inside to see this. 

The Fun Machine could only do so much. Remember that I bought super cheap plywood, the worst grade that the discount lumber place had on hand (and I am sure the workers there thought I was a little bit crazy). It looks great in this photo but there were some huge splinters, gashes, and knotholes that ran deep. We did not want to simply sand those spots lest we grind down too much and have an uneven floor. 

Now the ball was in my court: as a mother I had to save the baby's toes from splinters! I will tell you what I did in the next post!


Wednesday, October 26, 2022

Using Plywood for Finished Floors. Yes, We Really Did That! Part 5


As the floor marched across the top of the radiant heating, in the delicate process of nailing it down, our man-in-charge (one of our sons) became quite concerned about the amount of dirt everyone was tracking in on the heat spreaders.

Rules and regulations, even blockades began to appear. When he got to the entry, we weren’t allowed to come in the front door. Then when he let us come through, he had the dining room and kitchen blocked off. We were bringing in too much dirt. Because of this blockade, we could no longer access the extra refrigerator, but he would just go in with his (supposedly) pristine shoes and fetch whatever we needed for meals. He then became the “Ruler of Egypt” because we had to go ask him for corn and bread. 

(I cannot recall at this moment about the signs on the door but I will try to remember for you later. I think it had something to do with another project)

The stuff in the kitchen was moved and that was the final bit of plywood flooring nailed down! You can see in this photo that some of the boards were much lighter than others, and I will tell you in a later post how we dealt with that. While this post is not about the final finish, I will let you see another sneak peak of our color decision making process. 


My daughter sanded some plywood so I could do some color sampling. Unfortunately, I could not stand the noxious smell of the regular stain that you get at the hardware stores. You know, the durable stuff everyone else uses? I couldn't even bring the boards indoors that I had stained with that stuff. I could not imagine doing a house-full of floors with it! So I ordered some samples from a place called EcosPaints. Ecos wood stain is NOT SMELLY! I was very pleased about that. As you can see they had a good variety of colors.

(I will fast forward and tell you that since I used that brand until this post, it has not proven as durable as I would have hoped for certain applications, but I will do a post on that at a later date.)

I did like a few of these stains, but the real test eliminated them all!


We gave it the stomp test. 

We stomped all over the boards, and I am sure it was the kids' favorite thing to do that day. Remember the wise advice I had been given about choosing your floor color to match the dirt outside?  Since we have light colored dirt this was going to be a real hard test for any stain to pass. 


Personally, I really liked the darker stain. It had more of the old-General-store vibe I was going for. But  can you imagine the hourly clean up? We don’t tend to take our regular shoes off at the door in this part of the country (muddy boots excepted), although we are getting better at that recently. We still have a lot of construction yet to go through and I wouldn't make anyone take their workboots off. I am not sure I would even require company to take shoes off. So the dark board lost. I thought the lightest oak color might win, but nope, it also showed dirt.


The winner that day was the unmarked board that was simply coated in polyurethane!

 I think the lighter colors went better with the plywood anyway, at least they didn't show the contrast of the safari stripes as bad. (By the way, it's starting to look like legitimate flooring, isn't it?)

To be continued...


Monday, October 24, 2022

Using Plywood for Finished Floors. Yes, We Really Did That! Part 4

And over radiant flooring, too!

I have to say that sifting through these photos for the flooring parts brought such a feeling of excitement, because so much went on at the same time. We had tile going in, electrical work being done, window trim, walls painted, and even tile purchases (which as you know by now can be pesky). I'm going to break up the chronology a bit and pick out the radiant heat part for this post, and let you know that these photos cover about two months. 

( I have to do a little correction on that last post. After two weeks I revisited it and realized that I had been confused when recalling that stack of boards. We did have some plywood that was being cut up for the underlayment of our finished floor. The under part had to have "channels" for our radiant heat.We did take out of the underlayment boards for the finish floor boards, because by then we were getting good at spotting the boards with just the right character!)


The first plywood boards went down with an appropriate gap inbetween for the heating lines, and were distanced according to the curve tolerance of the line material, as you will see. So we could not help how far apart these lines laid necessarily. 


At last that OSB subfloor was covered up! Already a huge improvement!


Talking about some tricky bits no doubt.


Oh look, another helping hand!


We ordered metal parts called "spreaders" that would help the heat from the pipes to radiate under the wooden floor. These are very thin (and as you can see were damaged in transit). They have a dip for the pipe to sit in. Do they work? Well... yes. 


These spreaders do spread heat under the wood floor. But I will fast forward to the finish just to let you know: there are hot & cold "stripes" on the floor because we could not get the spreaders any closer for those curving lines to work. But definitely when you are standing on the part of the floor with the spreader you can feel the heat! And frankly, if we had done a tile floor we might still have had hot  and cold stripes for all I know. We were just doing the best we could to make that heat work!


It was up to one son in particular to figure out the pattners, measure distances, cut, and nail these boards just so to make this work. And he did it! I'm sure it helped that he has a hobby of drawing complicated mazes. 


If we had an old dog that was always cold, I know this under-the-stairs part would be its "room." All the lines of heat go under this cubby to their final destination of the manifold controls. Surely the nicest place to be when it is 20 degrees out!

Only one mistake was made in all this: somehow the plan of laying this pex pipe UNDER the bathtub in the bathroom was either forgotten or somehow not possible (I recall that it was forgotten, but I could be wrong). We should have it it where all pipes gather under the tub on the way to the manifold!


And here comes the plywood floor! This had to be laid carefully because this is not a "floating floor." It is nailed down and we had to be careful that those nails did NOT puncture those tubes! There would be no way of knowing until we were done if there were any leaks.
To be continued! 


Friday, October 14, 2022

Using Plywood for Finished Floors. Yes, We Really Did That! Part 3

[Edited to update: I was probably a bit tired when I went through these photos and wrote this up: this is actually the underlayment for the finished floors and that is why they are all the same size. We did take many boards out of this mix for our finished floor as we sorted through!]
Now we cut up enough plywood to play with!

The moment of truth: would enough of this plywood together look awful? Would it look like mixed-up plywood? Would it have those dreaded safari stripes?

These boards are all the same width here, unlike the ones you have seen in the last two posts. I can't remember why but perhaps we were looking for patterns. 

I remember how exciting this was to see flooring, any kind of flooring over the sub-floor. 

I also remember that my husband was starting to say that he was kinda getting used to those safari stripes. Yikes! You can see them in this photo: the wider open "grain" of the plywood is what could look very zebra-like if we weren't careful. 

Here is a daytime photo of a corner experiment. It sure was fun playing with this idea. 

If you are interested, look up how plywood is made, and the different ways they can slice it at the mill. Plywood is structurally stable just like engineered flooring, because of the layers that are glued together. And it did not need acclimating for weeks and weeks, because plywood is just going to stay put and not shrink up or expand. 

We were going to do it! A plywood floor. How crazy is that? 

Wednesday, October 12, 2022

Using Plywood for Finished Floors. Yes, We Really Did That! Part 2


The secret to making the plywood floor look like it is NOT plywood, is to vary widths and mix 'em up. My sons cut these boards 7", 5" and then threw in some 4" widths. It was the perfect mix. 


Now we had the fun of deciding colors. 

(Would you look at those character-full cracks?) 

Our choices were dark, honey, clear, white-washed, whatever that one is called that turns gray (is that walnut?) and black. I was using an "eco" stain brand and ordered some sampler bottles. 

Here is a sampler of the looks you can get with plywood. At all cost we wanted to avoid any Safari Stripes. 

The plywood was winning as an option! 
Next Post: laying it out in the living room!

Monday, October 10, 2022

Using Plywood for Finished Floors. Yes, We Really Did That! Part 1

[Happy Canadian Thanksgiving to my Northern readers! I always say you have the best date for a Thanksgiving gathering. I hope you are enjoying it.]

 I have been wanting to share this post with you for a while! I have so much to say it will take several posts to get to it! 

In the midst of the Tile Decisions Difficulties, we were also making decisions on flooring. As with everything we attempt to do, it was complicated. 

First of all, we had radiant heat for our floor. That was not a bad decision, but the best way to cover a heating system like this is with tile or a spreadable, lightweight concrete type product. Tile was just too harsh of a surface for our living spaces, and the quote for the pour-in stuff was more than we could swallow at the time. It also would have raised the floor level a bit more than planned because of the thickness needed, and that was going to maybe cause a problem with the stair landing. That would have been okay I guess, as the tile that we were going to put in bathrooms and such was already messing with our finished floor levels (we had not considered the "sandwich" that tile takes when we were planning). Still the price was daunting. 

I visited a Cracker Barrel restaurant that had moved into our area, and wouldn't you know I was taking pictures of the floors to show my husband. What about this wood-look tile, honey?

We had to look around for another type of floring. Wood floor has very little ability to spread that radiant heat, but people were saying it could work. Engineered flooring is listed as an option online for radiant heated floors. So we started to look at prices. I have already mentioned that my husband found the quality of some of that flooring rather poor.  We looked at just wood, but that comes with its own set of problems that have to do with the weather and again, prices seemed so high for hardwood. 

My vision for our flooring, especially in the kitchen, was something like an old General Store floor. Something from the 1820s pioneer era that had been walked on for hundreds of years and had that aged, last-forever patina. I knew that with my family's daily usage, it would get all the scratches and dings just like an antique floor, so may as well go for that look in the first place. We were going to be stuck with softwood anyway because of the price of hardwood.

 I also wanted very wide boards, like a tree-slice width! We liked the look of wide boards, but the wider you go the more you pay in the flooring world.

I started looking for more options online, and looking for this little idea that popped into my head: what if we just sliced up plywood? It's like engineered flooring. You can get some really nice plywood too. I found very few online who were actually doing it, or doing it to a tasteful level. Plywood can look like giant zebra stripes or tiger stripes on the floor. The color contrast when stained can be too strong with that effect. But the idea kept with me, and eventually (I do not know how!) I convinced my husband to try it.

So a-shopping we will go, and we were of course looking for really, really nice plywood. Yikes again on prices. Then one day I went to the local lumber outlet store and saw some really cheap, awful, beat-up, horrid stuff. Splinters abounded. It looked like it had been chewed up by a dinosaur. Literally had holes in the top layer. But, it had character! And, it was around $25 for a 4x8 sheet. We picked the best of the stack to bring home and play with it. 


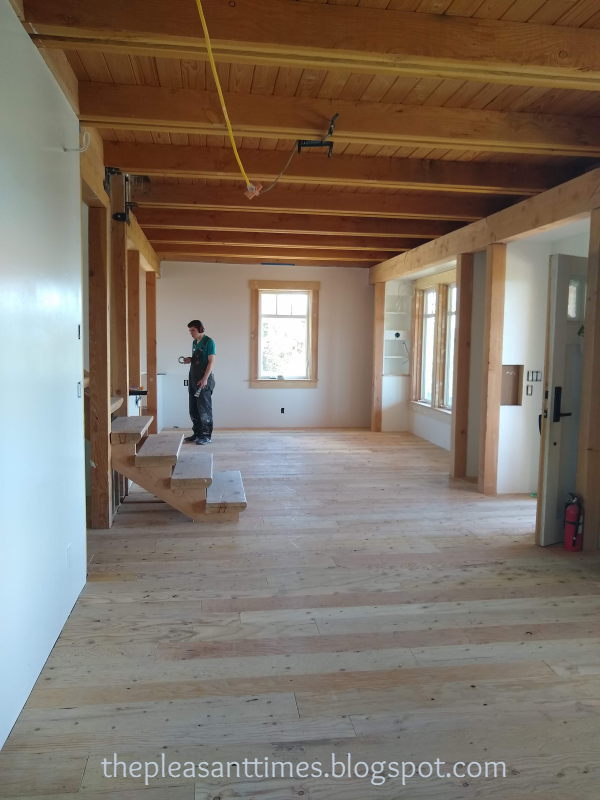
At home, my sons ripped it into 5 and 7 inch wide boards. I think they might have done 10 inch boards too, but there is only so far you can get with plywood before the sliced board looks like plywood. However I was enthused about these you see here. 

 Sanding it was a joke. Those splinters ran deep.


The boards with the tighter "grain" look were of course the most desirable. But even knots were welcome for my General Store floor. 

I will show you more of our experiment in the next post, including what it looked like with various stains and  laid out on the floor.  


Saturday, October 8, 2022

Covering


 I am not sure if I covered this subject yet (hah) but when the drywall was up, and "mudded," it was my job to get it "dusted" so I could prime it. The dusting didn't go so well in places. It is harder than you think! If you put too much damp cloth on it, you will basically turn the mud back to mud and it comes off. If you don't do enough, your paint will not stick, as you see here: 

What you see coming through was the green waterproof wallboard in the kitchen... because that spot wasn't dusted well enough. The primer would not stay on. 

And here is the same problem under a windowsill. Corners were the WORST places for me to both dust and caulk.

But ah, a freshly primed wall. 


Our drywallers did a great job with all of our quirky spaces. This is the laundry room, and we have soffits that hold a lot of plumbing pipe and a lot of blown-in-insulation (by the way, all the fixtures fed from these pipes that are in these soffits have near-instant hot water! Yay for maximum insulation!). 
 
And speaking of covering, we debated about covering up this ceiling all the way. I got to liking it the way it was, so that is why we had soffits for hiding pipes and wires and things and left the middle exposed. I wouldn't call it "industrial style" exactly,  but because my family worked so much on this house it feels nice to me to be able to still see some of  the joists (and more of my beloved ceiling) in this side room to remind me of its construction. Now the next debate is: do we paint this bit of ceiling or not? Whitewash it? I suppose we should do something...in really hot weather it drips sap!

Here's the upstairs half bath, with the blue paint covered over.  Recall that we had a "slick wall" treatment, meaning no texture sprayed on or spread on by the drywallers. Our rollers were going to leave enough texture by themselves. This was only paint coat #3. By the time I got a darker paint color #4 on (more on that later) there were enough "roller texture" bumps to make coverage very hard. We should have left it at  #3. 

Lastly, we have one of the Useful Things To Have During Construction. This is a roll of sticky plastic film (sorry, I can't remember the name) that we picked up at the lumber store. I think it was for covering carpet paths or something. We used it for everything from Wrapping a paintbrush to wrapping appliances. It covered up things for waterproofing and covered up things to keep dust out. This and foam board are highly recommended for a construction site!


Birthday Ritual Musings

We have a few family and friend birthdays to celebrate in October. I'm prepping for one this afternoon. I've been thinking about the typical USA birthday traditions and wondering how they became so prevalent as they are so humiliating! Especially for children's parties. If you ponder them for a moment, you may come to my conclusion that they are odd little rituals that we could just as well leave off.

Did you ever have to endure the "birthday spanking to grow on" when you were a child? Sometimes at your birthday party in front of all the little kids? Yes, I know it never hurt, but what was the point? Is it leftover from some superstition, or just to make you wait longer for the cake?

Did you ever do "pin the tail on the donkey" or "blind man's bluff" or something similar at a party? You know, the one where you are blindfolded, disoriented, and then became the object of everyone's hilarity as you groped around?

What about birthday hats? They are awfully similar to dunce caps. 

Blowing out the candles? Who started the tradition of melting wax all over the top of someone's cake, and then asking them to blow germs all over it before people ate it?

The Birthday Song-- can you think of a more embarrassing tune? I have refused to be sung to at all for the past 4 years. It is liberating on my special day not to be the focus of that song! Or any song! I don't like standing there with everyone staring at me singing a song that I am not supposed to participate in. It is usually sung out of tune and at the wrong pitch (nobody tunes up before they start singing it, have you noticed?) and led at a glacial pace. It drags, it sags. Folks, it's just not working anymore. But please don't substitute anything; it's just plain embarrassing to be sung at. 

Now I realize that some folks are just sentimental and these things are part of their good memories. For example, my family still has a shrunken, melted mass of plastic that decorated a cake top for 55 years. It was originally a little cowboy on a horse, from a set of toys. It rode to the top of a child's cake and continued to be exposed to flames until the poor horse and rider were unrecognizable to anyone not "in the know." But to have that melted mass on the cake was important to grandpa, to give him a good feeling I guess, and good memories of his family's birthdays gone by. Maybe I am not that sentimental.

I think that Americans are more and more "think outside of the box" type people and can come up with better birthday traditions, as indeed a lot of families have. When I was growing up, we got to pick a birthday trip in our beautiful and diverse state of Oregon. The coast, the desert, the state's tallest mountain and the world's deepest lake were all a few hours away for an afternoon to remember. I count my teen years by which places we were at for each birthday.

My own family have rather quiet home birthdays, partly because of construction (I have a lot of photos with messy or unfinished backgrounds!). We pick out a special meal, and a dessert. We sometimes have a pie instead of a cake (today we're making a chocolate cake upon request. Last year it was donuts!). My children have grown up with a candle in their own personal slice because we are germphobes (but still I wonder why we do even that candle thing?). We don't have humiliating party games. I can't get my better half to quit singing the birthday song to the kids, but if they are young enough they will sink under the table while it is sung. So I suppose we have a foot in the past, but I am open to other ideas!

Which humiliating birthday rituals have you left off? What have you substituted?


Friday, October 7, 2022

Excuse the Wildflowers

 It is a bit late in the year but these were in my construction photo file and I just love to share wildflowers! So I'm going to share them in the order I found them in my files. 

We live in a High Desert and not a lot of moisture (less than a foot a year). That particular spring of construction seemed greener, and we had an abundance of wildflowers just up the hill from the site. 


Arrow-leaf balsam root. 


And there you have it, a rare cloudy day in the High Desert.