
And over radiant flooring, too!
I have to say that sifting through these photos for the flooring parts brought such a feeling of excitement, because so much went on at the same time. We had tile going in, electrical work being done, window trim, walls painted, and even tile purchases (which as you know by now can be pesky). I'm going to break up the chronology a bit and pick out the radiant heat part for this post, and let you know that these photos cover about two months.
( I have to do a little correction on that last post. After two weeks I revisited it and realized that I had been confused when recalling that stack of boards. We did have some plywood that was being cut up for the underlayment of our finished floor. The under part had to have "channels" for our radiant heat.We did take out of the underlayment boards for the finish floor boards, because by then we were getting good at spotting the boards with just the right character!)

The first plywood boards went down with an appropriate gap inbetween for the heating lines, and were distanced according to the curve tolerance of the line material, as you will see. So we could not help how far apart these lines laid necessarily.

At last that OSB subfloor was covered up! Already a huge improvement!

Talking about some tricky bits no doubt.

Oh look, another helping hand!
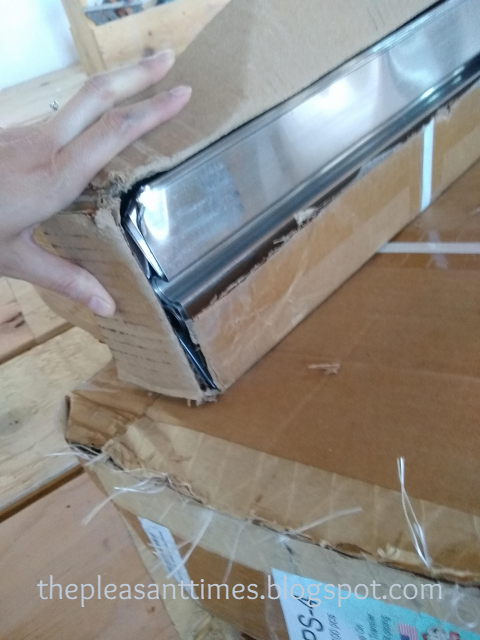
We ordered metal parts called "spreaders" that would help the heat from the pipes to radiate under the wooden floor. These are very thin (and as you can see were damaged in transit). They have a dip for the pipe to sit in. Do they work? Well... yes.

These spreaders do spread heat under the wood floor. But I will fast forward to the finish just to let you know: there are hot & cold "stripes" on the floor because we could not get the spreaders any closer for those curving lines to work. But definitely when you are standing on the part of the floor with the spreader you can feel the heat! And frankly, if we had done a tile floor we might still have had hot and cold stripes for all I know. We were just doing the best we could to make that heat work!

It was up to one son in particular to figure out the pattners, measure distances, cut, and nail these boards just so to make this work. And he did it! I'm sure it helped that he has a hobby of drawing complicated mazes.

If we had an old dog that was always cold, I know this under-the-stairs part would be its "room." All the lines of heat go under this cubby to their final destination of the manifold controls. Surely the nicest place to be when it is 20 degrees out!
Only one mistake was made in all this: somehow the plan of laying this pex pipe UNDER the bathtub in the bathroom was either forgotten or somehow not possible (I recall that it was forgotten, but I could be wrong). We should have it it where all pipes gather under the tub on the way to the manifold!

And here comes the plywood floor! This had to be laid carefully because this is not a "floating floor." It is nailed down and we had to be careful that those nails did NOT puncture those tubes! There would be no way of knowing until we were done if there were any leaks.
To be continued!
No comments:
Post a Comment
READ ME FIRST!
Pleasant Letters are Most Welcome!
Comments will be moderated for spam control and people having a bad day or making poor life choices.
Due to time constraints it may take a few days to publish and respond to your comments.