
Top: Folded Tea Wallet. Below, Tea bag-shaped Tea Wallets
Tutorials below!
I noticed on the blog stats that someone was looking for a tea wallet to make without sewing. I hope that someone comes back because I think I figured out a couple of no-sew tea wallets!
It is helpful that I have been called in by the interns to help make some very complicated origami-type paper airplanes this week. I got to thinking I could fold a tea wallet. I am not an origami expert by any means-- I am an amateur at the art-- but I did have an old set of origami instructions for a folder, and a free Sunday afternoon. Here are the instructions for a tea wallet using the folder twice-- on each end of a paper-- for a double-folder tea wallet! It is just a wee simple bit of origami, so give it a try!
(And no, there is nothing wrong with your eyes. The photos actually are blurry at times!)
You will need a 12x12" piece of pretty scrapbook paper (an 8.5x11" works just as well, but it is nice to have the little bit of extra roominess of the bigger sheet), double sided tape or regular tape or glue, a ruler and a ribbon.

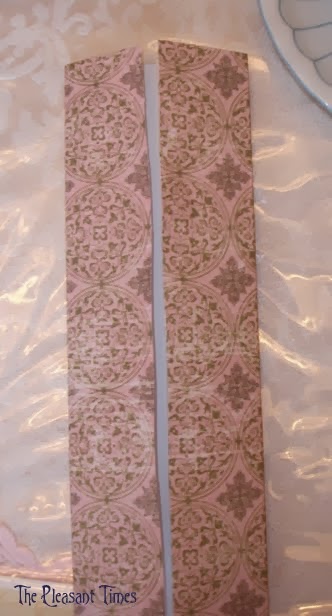
Cut the scrap paper so it will be 9x12". Save the strip of leftover paper.
You will need to make some creases in this paper, to get your bearings. Now Turn it over to the blank side and make these creases:
A vertical crease in half, then unfold.
Now a horizontal crease in half, then unfold.
Now crease another vertical crease, taking the outside edge and placing it on the center line.
Do this to the other side so that the edges meet in the middle.
Now open it up. You should have 3 vertical creases and 1 horizontal crease.
Now fold the top half down to meet the middle mark. Crease.
Fold the bottom half up to meet the middle mark. Crease.
Now, fold down the corner like this. The top of the paper should be folded to match one of those side creases you had earlier. You'll see what I mean when you do it better than I can explain it!
All four corners should be equally folded down. It will look like what you see above. To make the next few steps easier, fold the corners to the back and to the front again, several times, to make the corners really flexible.
Now fold in the edges to the middle again, crease again, then unfold.
Now here comes the tricky bit, but since you have such flexible corners, it should make it easier. Open up the corners...
...and flatten like so.
Do that to all the corners. It will look like this.
Now flip it over.
Fold each side in towards the middle.
It should look like this (sorry for the blur). You might want to put a bit of tape on this now, in the middle, to keep the ends down. Then flip it over to the other side.
On the other side, you will discover that if you lift up the narrow paper ends in the middle of the wallet, that they are free flaps. Fold each of these up twice to make a nice, clean edge.
The result should be what you see above. Take a bit of glue or some double-sided tape and tape these folded flaps flat.
You can be an eager beaver and put a couple of tea bags in it now-- but there's more! Unless you used double-sided scrapbook paper, which gives you a pretty inside
and outside, you will have a rather unfinished looking back to this tea wallet.
This is what the extra strip of paper is for. I found the unfinished middle of my tea wallet (mine is not taped yet) to be about 1 3/4" wide. I trimmed the leftover paper to that size.
Tape or glue it to cover the back (if you want to add a ribbon, now is the time- put it across the middle before you glue or tape this strip down).
Wrap it around, if you want, to cover the inside white. Remember to leave your folded white edges free! Tape or glue it down neatly.
Voila! Here is the finished wallet. I had a lot of fun making this for you!
Here's what it looks like folded.
Here's what it looks like if you add some ribbon. Gift wrap ribbon was handy so I used that. Real ribbon or pretty trim would be nicer.
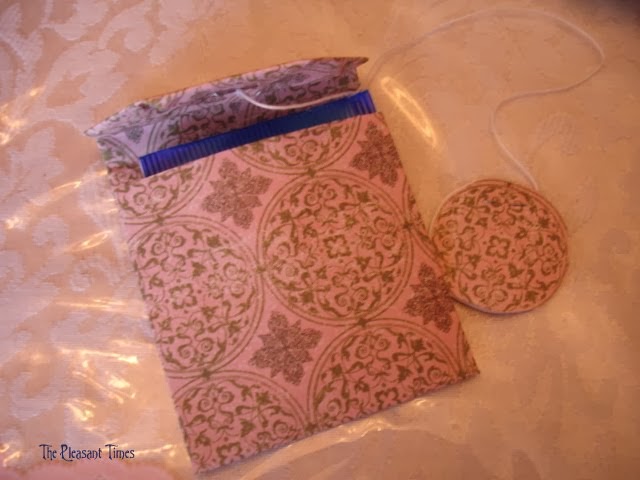
FOR the next tea wallet, I examined a real tea bag to see what I could do. This one is also very fun to make, and the prettier the paper the better! You will need scrapbook paper, or a rubber stamped paper would do as well, tape, string and staples.
This paper is cut 6x9".
Fold each edge towards the center, the long way. Tape down the middle with regular tape.
You can see the opening where you will be putting your tea bag.
Fold this up about 3" or less, depending on your tea bag's size.
Here I have placed a tea bag in the spot so you can see what I mean.
Now fold the top corners down towards the center.
And fold the top triangle point down as shown.
Cut a length of string about 10" or so. Put the string over this folded corner, and wrap the string around the back of this spot as well, and staple.
Now you need a tag for your tea bag! fold some paper over to make the tag. Cut a tag shape, a square, or a circle (I used the pattern of the paper for a shape). You just want to make sure that the top edge is a fold.
Open up your tag that you cut out, and loop the other end of the string and lay it down at the fold.
Staple through all layers on the outside.
Now fold down the top of your "tea bag" over the real tea bag, wrap the string around the front and up around the back...
... and tuck the tag around the string to hold it down.
Isnt' this CUTE? It was so much fun to make!
Make half a dozen of them!
I hope these instructions are clear enough for everyone !
Oh, and Happy Valentine's Day!


1 comment:
Delighted to find a paper/cardstock tea wallet. All the others I've seen are fabric and that's not what I want.
Post a Comment
READ ME FIRST!
Pleasant Letters are Most Welcome!
Comments will be moderated for spam control and people having a bad day or making poor life choices.
Due to time constraints it may take a few days to publish and respond to your comments.